Underground Wireless Flow Meter Installation: ¾-inch Poly
Last Update:Aug 20 2025 5:47am • Est. Read Time:Est. Read Time: 8 MINAll R3 controllers manufactured after November ’21 are not compatible with the Rachio Wireless Flow Meter.
Let’s get started!
The first part of this manual is designed to set you up for a successful installation. Before any pipe is cut:
- Ensure system compatibility.
- Gather all required parts and tools.
- Scan the installation instructions to preview the requirements and what you will be expected to do.
Caution
- Rachio recommends professional installation; however, we provide installation instructions for handy people with DIY skills.
- Rachio recommends specific installation instructions based on your pipe size and material. Using any installation methods other than those recommended could damage the Wireless Flow Meter or void the warranty.
- Using glue of any kind will damage the flow meter.
- Underground installation times can vary based on irrigation setup. While underground installation times can average 2 hours, we recommend 3.5 hours for adequate time.
- If you cannot complete any of the steps, we recommend a professional installation.
System compatibility
- The installation site must be within 75 feet of an above-ground (not in a basement), indoor, installed, and set up Rachio 3 Smart Sprinkler Controller.
- The flow meter is not rated for potable water and must be installed after the backflow preventer.
- The system must have a ¾-inch or 1-inch pipe made of either copper, PVC, PEX, or SDR-9 poly.
- For 1-inch or ¾-inch copper or PVC pipe, you will need 17 inches of straight pipe between the backflow preventer and valve box.
- If you have more than one Rachio 3 controller, more than one backflow preventer, or a pump, visit rachio.com/flow-advanced.
Caution
The following Rachio Wireless Flow Meter installation instructions are intended only for underground installations in irrigation systems with a ¾-inch Poly pipe. If your system uses a different pipe size and/or material, please visit rachio.com/flow for instructions tailored to your system.
What’s in the box
- Rachio Wireless Flow Meter
- Battery cover
- 4 screws
- 2 AA batteries (do not install batteries until prompted)
What you’ll need
Note
Installation instructions are intended only for use with required fittings. Using glue of any kind will damage the Rachio Flow Meter.
- Required fittings (listed below)
- Poly pipe cutter
- 4-inch transition piece made of 1-inch PVC pipe
- A valve box at least 23 inches long to cover the flow meter and unions
- Shovel
- Trowel
- Sandpaper or deburring tool
- Measuring tape
- Phillips screwdriver
- A rag
- Smartphone or tablet
- Channellock (to tighten unions)
- Box cutter (if you have ground cover [weed barrier] between your valve box and backflow preventer)
- Rake (if there are small rocks covering the ground between the valve box and backflow preventer)
- Optional: Tarp (to pile dirt on)
- Optional: Pickaxe (to break up compacted soil)
Required parts and fittings for ¾-inch Poly pipe underground
Required fittings:
- Three (3), 1-inch PVC lock fittings
- Orbit model #38676. Available at Home Depot and Amazon.

- Orbit model #38676. Available at Home Depot and Amazon.
- Two (2), PVC Swivel Adapters
- Orbit model #57202. Available at Home Depot and Amazon.

- Orbit model #57202. Available at Home Depot and Amazon.
- Two (2), ¾-inch Poly Adapters
- Orbit model #57188. Available at Home Depot and Amazon.
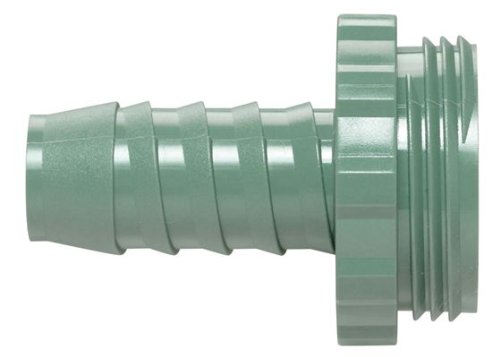
- Orbit model #57188. Available at Home Depot and Amazon.
- One (1) 4-inch long piece of 1-inch diameter PVC
- Caution: Changing the length of the transition pipe will affect the amount of pipe that you will be instructed to remove.
- You may need to purchase a longer piece and cut off 6 inches.
- Available at Home Depot and Lowe's.
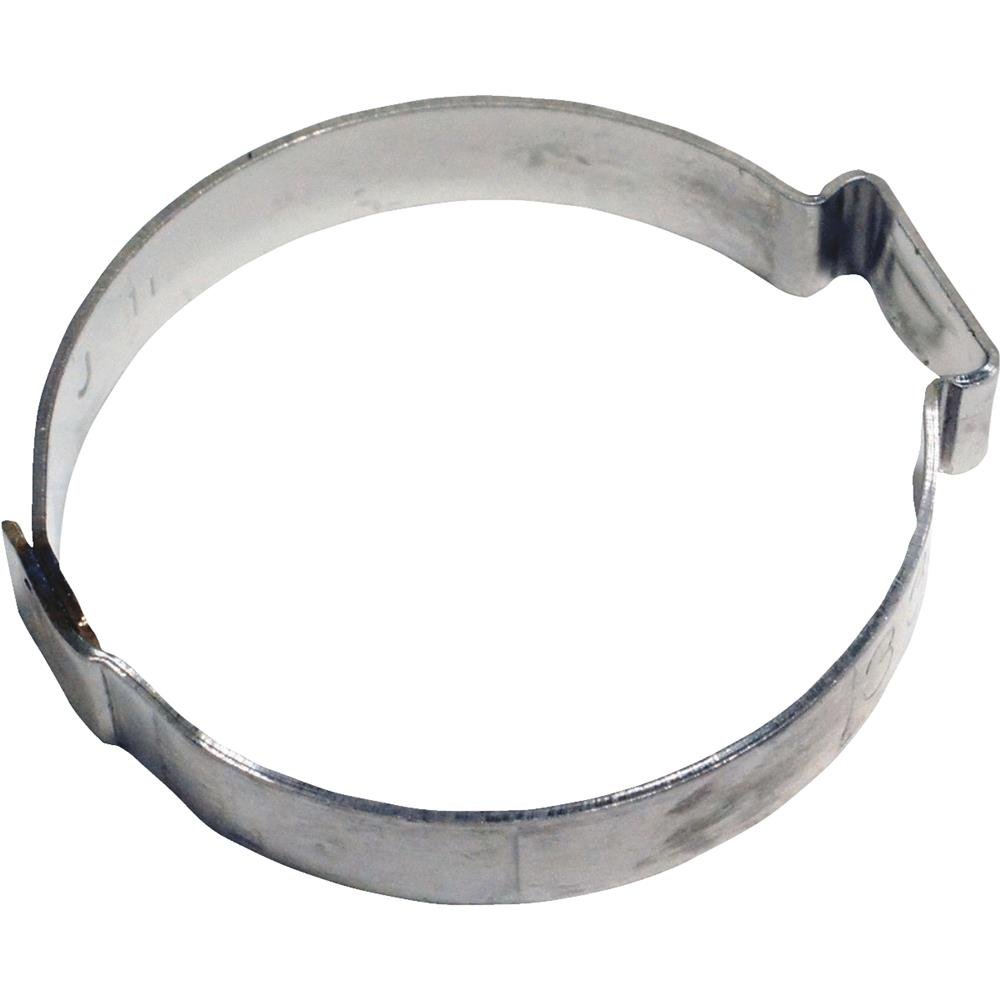
- 1 pack of ¾-inch Poly Pipe Pinch Clamps
- Apollo model #polypc3410pk. Available at Home Depot and Amazon.
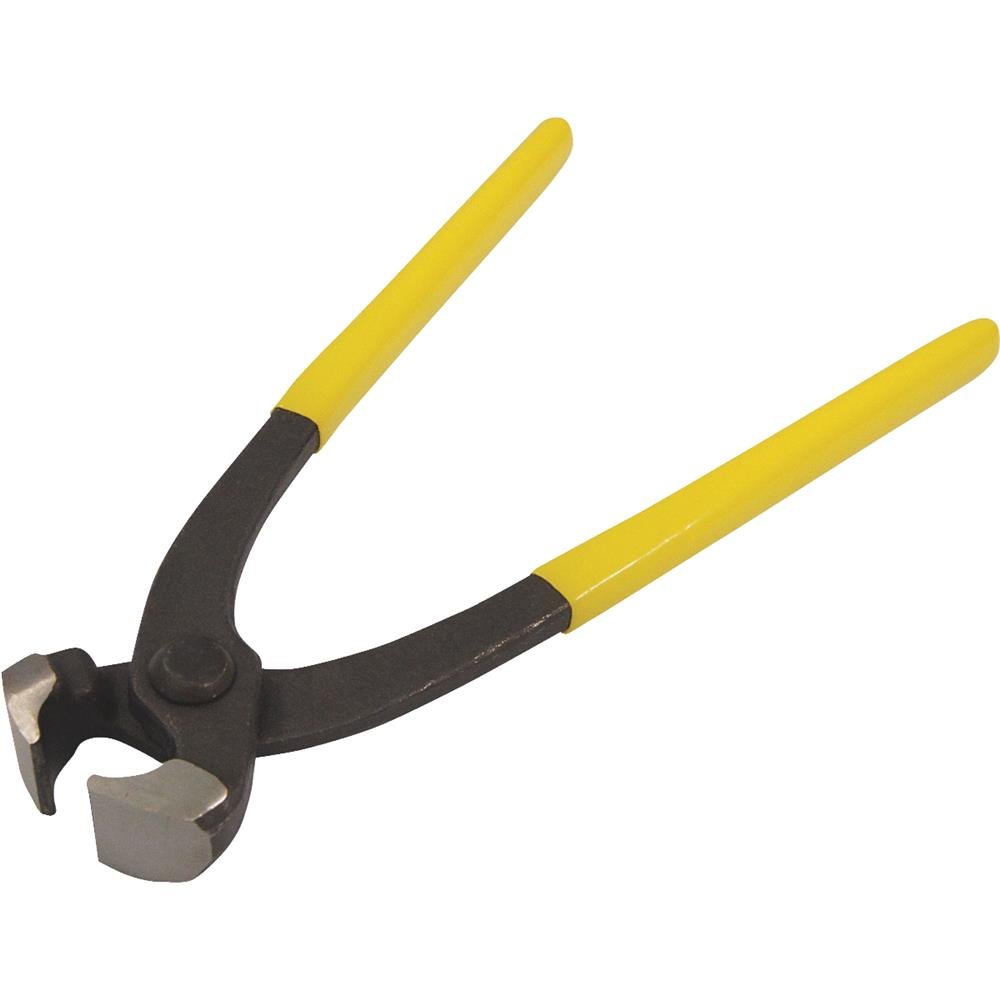
- Pinch Clamp Tool
- Apollo model #polyptk. Available at Home Depot and Amazon.

Above: Wireless Flow Meter with all parts and required fittings for 1-inch poly underground installation.
Take Note
Note
Using installation methods other than those recommended in this manual could damage the Wireless Flow Meter or void the warranty. Using glue of any kind will damage the Rachio Flow Meter.
Caution
Inserting your fingers into the flow meter or fittings can damage equipment or cause personal injury.
Once attached, fittings cannot be removed from the Flow Meter but may be removed from the pipe using fitting removers.
Need help?
- Check out our Help Center
- Give us a call at 1 (855) 300-3569
- If you’re unable to complete any of the installation steps, we recommend a professional installation. To find a Rachio Pro, go here.
Video Guide
Are you a visual learner? Preview the underground installation method in our video! These instructions are specific to 1-inch PVC underground installations; instructions and required fittings will vary depending on your pipe size and material.
Installation Instructions
Tip
Don't miss a step! For a successful installation, review and follow all instructions carefully before installing your Wireless Flow Meter.
Step 1: Locate Manifold
- Locate the valve box containing your irrigation manifold.
- Open the valve box; using the visible pipe, determine the direction and layout of the pipe that travels between the backflow preventer and valve box.
- The valve box must be within 75 feet of your Rachio controller.
Step 2: Dig
- Based on the determined direction and layout of the pipe, begin to dig where you guess there will be 21 inches of straight pipe between your valve box and backflow preventer.
- Continue to dig to expose more straight pipe if you detect any bends in the pipe.
- Dig a 2 ft. x 2 ft. hole (large enough to fit the valve box), then dig about an inch of soil out from under the pipe.
- If you do not have 21 inches of straight pipe, you can either hire a professional to redesign your irrigation layout or return for a refund.
Note
If you have multiple manifold boxes, you must place the flow meter before they split off.
Note
If you have rocks or other organic matter as ground cover, use a rake to remove it before digging. Use a box cutter to remove any weed barrier that may be under the ground cover.
Caution
Be careful not to damage the irrigation system wiring, which often runs alongside the pipe. If you see wire(s) - for instance, the black strand in the picture below - use the trowel and your hands to gently remove the dirt from around the pipe.

Above: An underground pipe with irrigation wire exposed.

Above: E.g., multiple manifold pipe layout.
Step 3: Pair flow meter
- Take the Wireless Flow Meter to the backflow preventer where it will be installed.
- Do not put the batteries in the Wireless Flow Meter until prompted.
- Open the Rachio app. From the "Settings" tab at bottom right, select "Accessories," then add the Rachio Wireless Flow Meter. You will be guided through the pairing process and then prompted to continue installation using this digital manual.
Step 4: Test connection stability
- Place the flow meter into the box it came in; put the box in the manifold valve box and replace the top.
- After 30 minutes, open the Rachio app. You should see the flow meter details screen. If you do not, go to the "Settings" tab at bottom right, select “Accessories”, then select the Wireless Flow Meter.
- If the flow meter status is “Connected”, remove the flow meter, and continue on to the next step. If the status is “Disconnected”, contact Rachio support.
Step 5: Turn the water off
- Turn off water to the irrigation system at the backflow or at the main shut-off.
- Drain the system by running any zone for one minute each using the Quick Run feature in the Rachio App.
Step 6a: Connect fittings to the flow meter
- Important: Push one PVC lock fitting onto the end of the flow meter that the arrow is pointing toward.
- Push firmly using a twisting action until the fitting is nearly flush with the flow meter.
- Push one PVC swivel adapter (the female side of the union) into the fitting up to the raised nubs on the body of the adapters.
- Press the down onto a hard surface to ensure the fitting and adapter are pushed in fully.
Step 6b: Connect transition piece and fittings to flow meter
- Push one PVC lock fitting onto each end of the 6-inch long, 1-inch diameter PVC transition piece.
- Push one PVC swivel adapter (the female side of the union) into either of the fittings up to the raised nubs on the body of the adapters.
- Connect the fittings and transition piece to the free end of the flow meter.
- Press the ends down onto a hard surface to ensure the fittings and adapters are pushed in fully.

Step 7: Measure for cutting
Instructions for cutting (¾-inch Poly underground)
- You should have 21 inches of continuous straight pipe exposed between the backflow preventer and the valve box.
- You need to remove 16 ¾ inches* of pipe to accommodate the flow meter and fittings (*exact measurements for use with the 4-inch long piece of 1-inch diameter PVC).
- Use the existing markings on the side of the poly pipe to note where you will make your top and bottom cut.
Caution
If you are using a piece of PVC transition pipe that is longer than 4 inches, you will need to change the amount of pipe you remove to accommodate the additional length.
Note
The first cut location should be at least two inches from the side of the hole closest to the manifold valve box.
Accuracy is important here! Measure twice, cut once.
Step 8: Cut and clean pipe
- Hold the pipe and use the pipe cutter to cut out 18 ¾ inches of pipe.
- If cutting leaves rough edges on the pipe, use a deburring tool or sandpaper to smooth the edges.
Step 9: Connect fittings to the pipe
- Use the rag to wipe off any dirt or matter from the cut sides of the pipe.
- Slide two poly pipe pinch clamps onto each side of the cut pipe.
- Insert one 1 inch poly adapter (the male side of the union) into each side of the cut pipe.
- Place the clamp tool over the top of the tab protruding from the clamp so that it sits in the indents at the base of the tab.
- Squeeze the clamp on either side of the protruding tab so that it creates an upside-down triangle shape.
- Pinch the clamp tab as tight as possible without damaging the clamp.
Step 10: Install the flow meter
Caution
Install so the arrows on the side and face of the flow meter are oriented with the direction of water flow. (Water flows towards the valve box, away from the backflow preventer.)
Caution
Install the flow meter face up.
- Align the flow meter section inside the cut pipe and fittings.
- Screw the unions securely together by hand (but don’t over-tighten).
- All Rachio recommended fittings can be removed at the unions, allowing for easy replacement of the batteries after installation.

Step 11: Turn water on
- Turn the water back on.
- Check the installation site for leaks. If there is a leak, turn the water off and make sure the clamps are secure, and the fittings are square and fully pushed up to the body of the flow meter.
- If there is a leak at the union, use the channellock to gently tighten the unions.
- If the leak cannot be remedied, visit rachio.com/leak.
Step 12: Install valve box
- Cut the plastic bar beneath the open arch of the valve box so that it can fit over the pipe. (See image.)
- Place the valve box over the pipe so the unions are covered.
- Ensure that you can reach into the valve box and unscrew the unions when the lid is off.
- Check that the top of the valve box is level with the surrounding ground, so it will not be buried by dirt or any ground cover.
- Fill in around the valve box with dirt.
Tip
If the valve box has any large openings, dirt and soil may enter the valve box while backfilling. To avoid, you can block dirt entry by placing cardboard panels along the outside of the valve box. Need cardboard? We suggest cutting panels from the flow meter box!

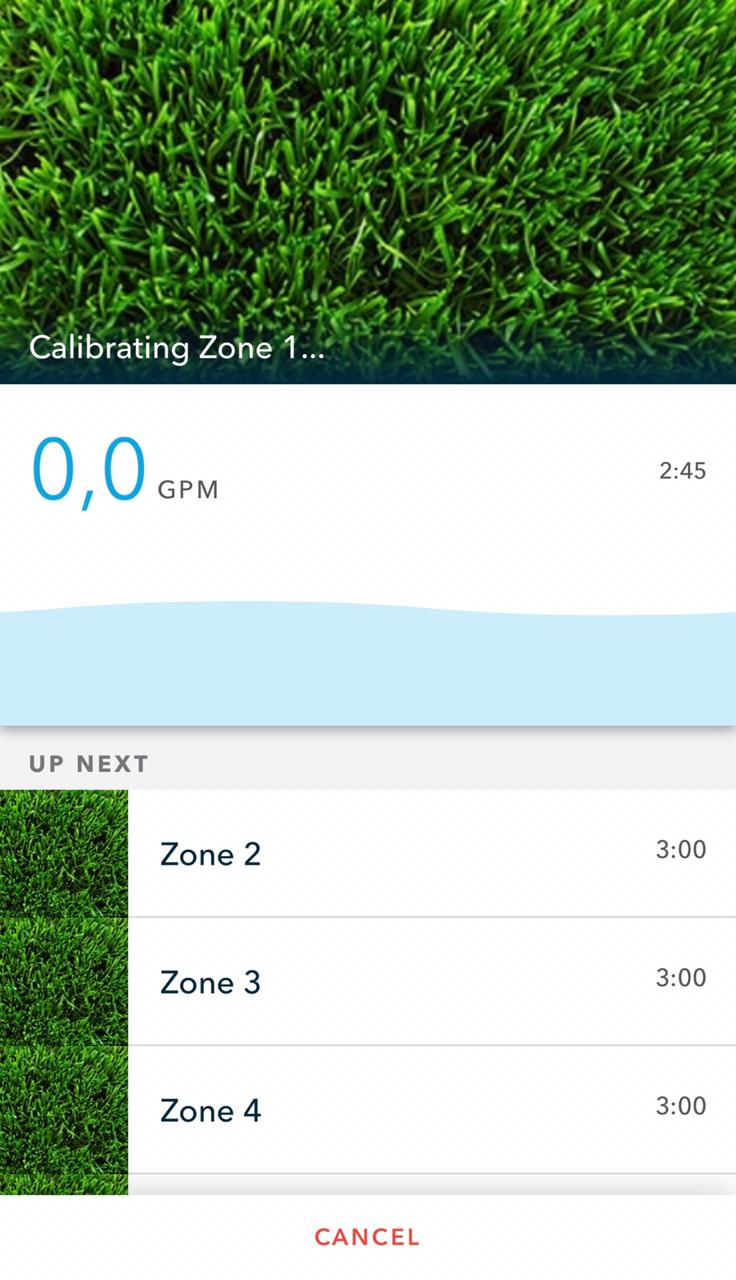
Step 13: Calibrate zones for leak detection
- To enable real-time leak detection, you must calibrate the Rachio Wireless Flow Meter. In the app’s "Settings" tab at bottom right, select "Controller Settings", then "Accessories,"; select the Rachio Wireless Flow Meter and tap "Calibrate Flow Meter". Follow the app instructions to calibrate.
- Check your email for tips on monitoring water flow and leak detection with your Rachio Wireless Flow Meter.
Congrats, you did it!
Your flow meter is now reporting actual water usage and monitoring for leaks. Want to explore Wireless Flow Meter notifications and what they mean? Check out this article for more information!
Do you still need help?
We have a chat support team ready to assist you! You can submit a support request by selecting the chat icon in the bottom right of this page and a member of the support team will contact you live.
Summer Hours (April-September)
7 am-6 pm (MST), 7 days a week.
Winter Hours (October-March)
9am-5pm (MST), Monday - Saturday. We are closed on Thanksgiving, Christmas, and New Years Day.