# Direct Access for Professional Installers
> What is Direct Access? Direct Access is a feature designed for Rachio professional partners. This feature should only be activated if you are an irrigation ...
Source: https://support.rachio.com/en_us/direct-access-for-professional-installers-BkZW_Iktw
Last updated: 2026-04-13T19:35:25.213Z
## Summary
Direct Access is a feature designed for professional installers to allow watering when WiFi connectivity is unavailable. This feature should only be activated if you are an irrigation or construction professional trying to connect or configure a new controller without WiFi.
Direct Access allows professionals to add new schedules to meet landscaper needs as a temporary solution, and **is not intended for homeowner use**.
#### Note
Direct Access is only available for Rachio 3 Smart Sprinkler Controllers.
#### Attention!
Direct Access requires a cellular data connection, so be sure to enable it before starting.
* * *
## How to use Direct Access
### Video Overview - English
###
### Video Overview - Español
###
## Step-by-Step Instructions
Direct Access can be found from the Rachio app login screen - simply select "Access Without Wi-Fi" and follow additional prompts.

1. **Scan the barcode**
Scan the barcode of the controller you would like to manage. You may enter the serial number manually as well, if you wish.

2. **Push the Wi-Fi button**
Once the barcode has been successfully scanned, hit the Wi-Fi button on the controller with a short, single press to create a Rachio hot spot.

3. **View, edit, start, & stop**
You can now view, edit, start, and stop schedules on the selected controller.

4. **Grow in Schedule** - This schedule will help with the grow-in period for new turf, plants, and trees. This schedule requires an end date. Once this end date has passed, the persistent schedule will start running.
To begin with **Grow in Schedule,** follow these steps:
Start by selecting your durations desired on a per-zone basis each time the schedule is set to run. 
Next, select the run times desired on a per-zone basis. You may select up to 6 different run times.
 
5. **Persistent Schedule** - These schedules are similar to “Grow in Schedules”, but do not have an end date. Be sure to set the start date on the same day as the “Grow in Schedules” end date. This schedule will stop once the user onboards the controller.
6. **Correctly disconnect & close out**
When finished, click the “Done or X” button at the top right corner of the screen and then tap the Wi-Fi button on the controller to disconnect from the Rachio hot spot.

7. **Import/Export Features** \- Are you working on homes that all have similar zone setups and require the same schedules?
For **iOS**:
Go to your settings and make sure that iCloud is toggle/turned “on” for Rachio. 
8. Return to the Rachio App and create a Direct Access schedule (Grow in or persistent) by following the steps above. Before completing the setup of the schedule, click on “Export” in the upper left-hand corner.
This will allow you to save this schedule to your iCloud to use for future controller setups. 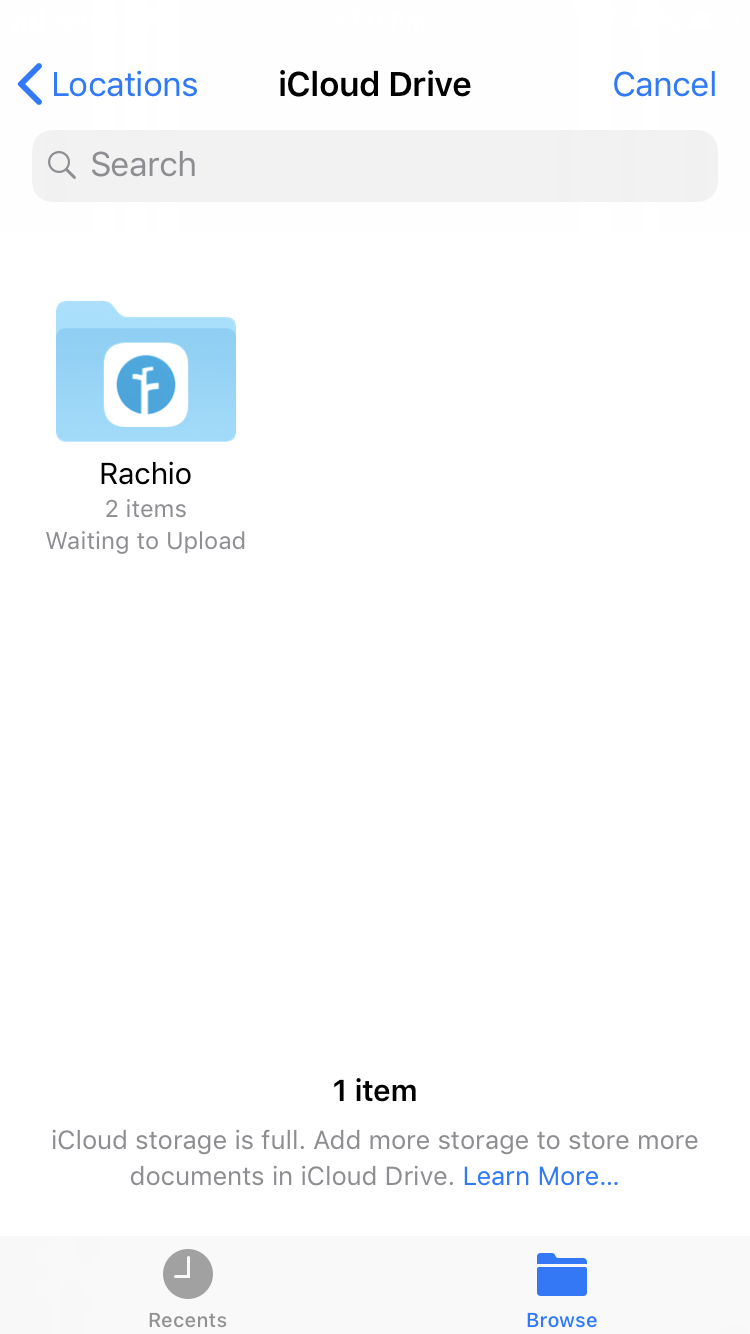
9. **Import a Previously Saved Schedule:**
Select a Grow In or Persistent Schedule, then click on “import” in the upper left-hand corner.
You will then be able to choose which schedule you would like to import from your iCloud Drive. 
\*Based on when you saved these schedules, the dates of the schedule might be in the past. Be sure to check the dates and adjust accordingly!
**For Android**: You will NOT need to adjust your phone settings. Instead, just follow the process outlined above and save your schedules to your desired storage app
#### Note
Before activating your controller with Wi-Fi, please make sure to remove any Direct Access schedules by performing a factory reset. If this step is not completed, your Direct Access schedules may run simultaneously with the schedules you create after onboarding your controller to your account. The steps to Factory Reset your controller can be found here:
[How do I factory reset my controller? Rachio 3, Generation 2, and Generation 1](https://support.rachio.com/how-do-i-factory-reset-my-controller-rachio-3-generation-2-and-generation-1-SkQsD8JFv#:~:text=Hold%20down%20the%20stop%20button,connect%20to%20Wi%2DFi).)
### **Do you still need help?**
We have a chat support team ready to assist you! You can submit a support request by selecting the chat icon in the bottom right of this page and a member of the support team will contact you live.
### **Summer Hours (April-September)**
7 am-6 pm (MST), 7 days a week.
### **Winter Hours (October-March)**
9am-5pm (MST), Monday - Saturday. We are closed on Thanksgiving, Christmas, and New Years Day.
[Go to Top ^](#top)